How To Make Your Own Shower Floor
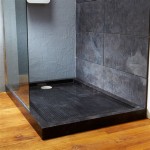
Building or renovating a bathroom can be a daunting task, especially when it comes to creating a shower floor that is both stylish and functional. However, with the right materials and tools, you can easily build your own shower floor that is both beautiful and durable. ### Materials Needed * 2x4 lumber * Cement board * Mortar mix * Waterproof membrane * Tile * Tile adhesive * Grout * Sealant * Safety glasses * Gloves * Dust mask * Level * Tape measure * Pencil * Utility knife * Trowel * Notched trowel * Grout float * Sponges * Buckets * Safety goggles ### Step 1: Frame the Shower Floor Begin by framing the shower floor using 2x4 lumber. Construct a simple frame that will support the cement board and tile. Make sure the frame is level and square. ### Step 2: Install Cement Board Once the frame is complete, install the cement board. Cut the cement board to size with a utility knife and score it with a scoring tool. Apply mortar mix to the back of the cement board and press it into place. Allow the mortar mix to dry completely. ### Step 3: Install Waterproof Membrane To ensure that the shower floor is waterproof, install a waterproof membrane over the cement board. Cut the membrane to size and use a trowel to spread thinset mortar over the cement board. Press the membrane into the mortar and smooth it out. Allow the mortar to dry completely. ### Step 4: Tile the Shower Floor Now it's time to tile the shower floor. Choose tiles that are slip-resistant and durable. Cut the tiles to size with a tile saw or a wet saw. Apply tile adhesive to the back of each tile and press it into place. Use a notched trowel to ensure that the adhesive is evenly distributed. Allow the adhesive to dry completely. ### Step 5: Grout the Shower Floor Once the tiles are in place, grout the shower floor. Mix the grout according to the manufacturer's instructions and use a grout float to apply it to the joints between the tiles. Allow the grout to dry completely. ### Step 6: Seal the Shower Floor To protect the shower floor from moisture and stains, seal it with a sealant. Apply the sealant to the grout and tile joints using a sponge. Allow the sealant to dry completely. ### Step 7: Enjoy Your New Shower Floor! Your new shower floor is now complete! Enjoy your beautiful and functional shower floor for years to come. ### Tips for Building a Shower Floor * Make sure the shower floor is sloped properly to allow water to drain. * Use a waterproofing membrane that is specifically designed for shower floors. * Choose tiles that are slip-resistant and durable. * Apply the tile adhesive and grout according to the manufacturer's instructions. * Seal the shower floor with a sealant to protect it from moisture and stains.
How To Build Shower Pans Diy Family Handyman
How To Build A Tile Shower Floor Pan Construction Diy

How To Build A Shower Pan 2 Methods Diytileguy
How To Build A Tile Shower Floor Pan Construction Diy

3 Shower Pan Choices For A Solid Tile Floor Installation Fine Homebuilding

How To Diy A Shower Pan The Space Between

How To Build A Tile Shower Pan Icreatables Com

How To Build A Shower Pan 2 Methods Diytileguy
:strip_icc()/101963996-8ee3078bc50240909d333e8024164b14.jpg?strip=all)
10 Things You Need To Know Before Building A Diy Walk In Shower

How To Build A Shower Pan 2 Methods Diytileguy
Related Posts


