Installing a stand-up shower door can be a great way to add privacy and a modern look to your bathroom. While it may seem intimidating, the process is not as difficult as it sounds. With the right tools and a bit of patience, you can have a beautiful stand-up shower door installed in your bathroom in no time.
Gather the Necessary Tools and Materials
Before you start the installation process, make sure you have all the necessary tools and materials. You will need a drill, screwdriver, measuring tape, level, silicone caulk, and the door and frame. If you’re not sure what you need, it’s always a good idea to consult with a professional before starting the project.
Prepare the Area
Before you begin, make sure the area is clean and that all the necessary tools are in place. You will also need to make sure the opening is the correct size for the door. If it’s too small, you will need to adjust the opening before proceeding with the installation.
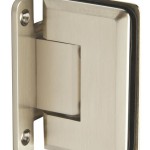
Installing the Door Frame
Once the opening is the correct size, you can begin installing the door frame. Start by positioning the frame in the opening and ensure it’s level. Secure the frame in place with the screws provided. Once the frame is secured, you can move on to the next step.
Installing the Door
Before installing the door, make sure the frame is level and adjust if necessary. Then, place the door in the frame and secure it with the screws provided. Once the door is in place, use the silicone caulk to seal any gaps. This will help prevent leaks and drafts.
Finishing Up
Once the door is installed and sealed, you can begin to enjoy your new stand-up shower door. To keep it looking its best, make sure to clean it regularly and replace any worn or broken parts as needed. With the proper care and maintenance, your stand-up shower door should last for many years to come.


Related Posts