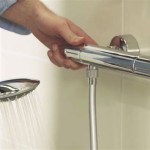
Rough in shower valves are an essential component of any bathroom renovation or remodelling project. Whether you’re replacing an old valve, installing a new one, or just doing routine maintenance, understanding the basics of rough in shower valves is important. This article will explore the different types of rough in valves, how to select the right one, and how to install it properly.
Types of Rough In Shower Valves
Rough in shower valves come in a variety of types, including:
- Single-handle rough in valves
- Dual-handle rough in valves
- Pressure-balance valves
- Thermostatic valves
- Anti-scald valves
Single-handle rough in valves are the most common type of valve, and they allow you to control the temperature and flow of water with a single handle. Dual-handle rough in valves are similar, but they have two handles – one for temperature, and one for flow. Pressure-balance valves are designed to maintain a consistent water pressure, and thermostatic valves are designed to maintain a consistent water temperature. Anti-scald valves are designed to limit the water temperature to a safe level, to prevent scalding.
How to Select the Right Rough In Shower Valve
When selecting a rough in shower valve, you’ll need to consider a few factors, including:
- The type of valve that’s best for your needs
- The size of the valve
- The material of the valve
- The design of the valve
Depending on your needs, you may want to select a single-handle, dual-handle, pressure-balance, thermostatic, or anti-scald valve. The size of the valve should be appropriate for the size of your shower, and the material should be able to withstand the water pressure and temperature. The design of the valve should also be considered – make sure it fits the style of your bathroom.
How to Install a Rough In Shower Valve
Installing a rough in shower valve is a relatively simple process, but it’s important to do it correctly. Here are the steps you’ll need to take:
- Turn off the water supply.
- Remove the old valve.
- Prepare the new valve.
- Connect the new valve.
- Test the valve.
When you’re ready to install the new valve, make sure you follow the instructions carefully, and wear protective gear. When you’re finished, turn the water supply back on and test the valve to make sure it’s working properly.
Conclusion
Rough in shower valves are an essential component of any bathroom renovation or remodelling project. Understanding the different types of valves, how to select the right one, and how to install it properly will help you ensure that your shower is safe and functional for years to come.


Related Posts