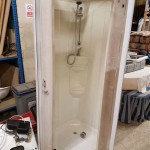
Do-it-yourselfers looking to add a stylish, efficient shower to their bathroom may want to consider installing a Redi Tile shower pan. Redi Tile shower pans are quick and easy to install, and are available in a variety of sizes and shapes, so they can be customized to fit any bathroom. In this article, we will provide you with a step-by-step guide for installing a Redi Tile shower pan.
Step 1: Make Sure You Have All the Necessary Materials
Before beginning the installation process, make sure you have all of the materials you need. You’ll need the Redi Tile shower pan, a level, a trowel, waterproofing membrane, grout, and sealant. Additionally, you may need a hacksaw to cut the pan to fit your bathroom space.
Step 2: Prepare the Shower Space
The next step is to prepare the shower space. Begin by removing any existing fixtures, such as showerheads and faucets. Once you have removed these items, use a level to ensure that the floor is level. If necessary, use a trowel to level out any areas that are uneven.
Step 3: Install the Redi Tile Shower Pan
Once you have prepared the shower space, it’s time to install the Redi Tile shower pan. Before doing so, make sure to measure the space to ensure that the pan fits properly. If necessary, use a hacksaw to cut the pan to size. Once you have the correct size, place the pan in the shower space and use a level to make sure it is level. Secure the pan to the walls using the provided mounting hardware.
Step 4: Apply Waterproofing Membrane and Grout
Now that the Redi Tile shower pan is in place, it’s time to apply the waterproofing membrane and grout. Begin by applying the waterproofing membrane to the walls and floor of the shower space. Make sure to cover all of the seams and joints, and use a trowel to press the membrane into place. Once the membrane has been applied, use a trowel to apply the grout, making sure to fill all of the seams and joints.
Step 5: Apply Sealant
After the grout has dried, it’s time to apply the sealant. Make sure to cover all of the seams and joints, and use a brush to spread the sealant evenly. Once you have applied the sealant, allow it to dry for at least 24 hours before using the shower.
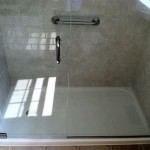
Conclusion
Installing a Redi Tile shower pan is a relatively simple process that can add style and efficiency to your bathroom. By following the steps outlined in this article, you can ensure that your Redi Tile shower pan is installed properly and will last for years to come.


Related Posts