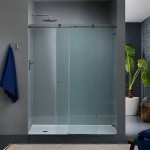
A fiberglass shower pan is an essential component of any bathroom, providing a secure base for your shower fixtures and protecting your bathroom floor from water damage. Installing a fiberglass shower pan correctly requires careful planning and precise measurements, and it is important to purchase the correct size and shape of pan for the space. This article will provide you with step-by-step instructions on how to install your new fiberglass shower pan.
Step 1: Measure Your Space
Before you purchase a new fiberglass shower pan, you must accurately measure the space you have available. You should measure the length, width, and height of the space and make sure to leave at least 1/2 inch of clearance on all sides for the installation. It is also important to note the direction of the drain, as this will determine which way you install the pan.
Step 2: Purchase the Right Pan
Once you have measured your space, you can purchase the right fiberglass shower pan for your bathroom. Most pans come in standard sizes and shapes, so you should be able to find one that fits your space. It is important to purchase a pan that is the correct size, as any gaps between the pan and the wall can cause water damage.
Step 3: Prepare the Space
Once you have purchased the right pan, you can begin the installation process. Before you begin, you should prepare the space by cleaning the area and removing any debris or dirt. You should also check the floor for any imperfections, as these can cause the pan to sit unevenly or leak. If you find any imperfections, you should repair them before proceeding.
Step 4: Install the Pan
Once the space is prepared, you can begin to install the pan. Start by placing the pan in the space and lining it up with the drain. Once it is in place, use a level to make sure the pan is even. If it is not, you can adjust it by using shims underneath the pan. Once it is even, you can secure it to the floor by using screws or adhesive.
Step 5: Connect the Drain
Once the pan is installed, you can connect the drain. This is best done by using a flexible drain connector, which will allow you to connect the drain to the pipe in the wall. Once the drain is connected, you should test it to make sure there are no leaks.
Step 6: Finish the Installation
Once the pan is installed and the drain is connected, you can finish the installation. This includes applying sealant around the edges of the pan, as well as any other areas where water might leak. You should also install any fixtures that you wish to use in the shower, such as a shower head, body jets, or hand-held shower. Once all of these steps are completed, your fiberglass shower pan should be fully installed and ready to use.


Related Posts

