Having a shower in your home is a great way to relax and get clean, but it also has the potential to cause serious water damage. To ensure your shower is properly waterproofed, follow these steps.
Step 1: Clean the Shower
Before you begin the waterproofing process, you’ll need to make sure the shower is clean. Use a mild cleaning solution and a scrub brush to remove any dirt, mildew, or other debris from the walls and floor. Doing this will help the waterproofing products to adhere better, and help prevent future water damage.
Step 2: Apply a Waterproof Membrane
Once the shower is clean, you can begin applying a waterproof membrane. This membrane is usually a type of paint-on or roll-on product that seals the shower walls and floor in order to prevent water from seeping through. Follow the instructions on the product’s packaging in order to properly apply the membrane.
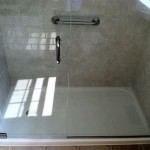
Step 3: Install a Shower Base
If you don’t already have a shower base, you’ll need to install one. These pre-made bases are designed to form a sealed barrier between the shower walls and the floor to prevent water from seeping out. Make sure to read the instructions carefully when installing the base in order to ensure a proper seal.
Step 4: Test for Leaks
Once you’ve completed the waterproofing process, it’s important to do a thorough test for leaks. Fill the shower with a few inches of water and let it sit for several hours. If you don’t see any water seeping through the walls or floor, then you’ve successfully waterproofed your shower.
Conclusion
Waterproofing your shower is a simple but important step in protecting your home from water damage. By following these steps, you can be sure your shower is properly sealed and ready to use. Remember to test for leaks after the waterproofing is complete to make sure the job was done properly.

![Should You Waterproof Shower Ceiling [And How to do that in 6 Steps]](https://i2.wp.com/uooz.com/wp-content/uploads/2020/10/Should-You-Waterproof-Shower-Ceiling.jpg)


Related Posts