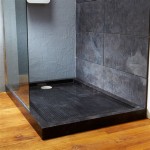
How to Make Your Own Shower Pan for Tile: A Step-by-Step Guide
Tiling your shower is a great way to add a personal touch to your bathroom. But before you can start tiling, you need to create a shower pan. A shower pan is a waterproof barrier that prevents water from leaking through the floor. You can buy a pre-made shower pan, but they can be expensive. If you're on a budget, you can make your own shower pan for tile. It's not a difficult project, but it does require some time and effort. ### Materials Needed * 3/4-inch plywood * 2x4 studs * 1/2-inch cement board * Waterproof membrane * Thin-set mortar * Grout * Tile ### Tools Needed * Saw * Drill * Hammer * Screwdriver * Level * Tape measure ### Instructions 1.Prepare the Subfloor
The first step is to prepare the subfloor. Make sure the subfloor is level and free of any debris. If the subfloor is not level, you will need to level it using a self-leveling compound. 2.Build the Shower Pan Frame
Next, you need to build the shower pan frame. The frame will support the shower pan and the tile. To build the frame, use 2x4 studs and attach them to the subfloor using screws. The frame should be at least 3 inches high. 3.Install the Plywood
Once the frame is built, you need to install the plywood. Cut the plywood to fit the frame and attach it using screws. Make sure the plywood is level. 4.Install the Cement Board
The next step is to install the cement board. Cut the cement board to fit the plywood and attach it using screws. Make sure the cement board is level. 5.Install the Waterproof Membrane
Now you need to install the waterproof membrane. The waterproof membrane will prevent water from leaking through the shower pan. Cut the waterproof membrane to fit the cement board and attach it using thin-set mortar. 6.Install the Tile
Once the waterproof membrane is installed, you can start installing the tile. To install the tile, use thin-set mortar. Apply the thin-set mortar to the back of the tile and press it into place. Make sure the tile is level. 7.Grout the Tile
Once the tile is installed, you need to grout the tile. To grout the tile, use grout. Apply the grout to the joints between the tiles and press it into place. Wipe away any excess grout with a damp sponge. 8.Seal the Shower Pan
The final step is to seal the shower pan. To seal the shower pan, use a silicone sealant. Apply the silicone sealant to the joints between the tile and the shower pan. ### Tips * When choosing tile for your shower pan, make sure to choose tile that is non-slip. This will help prevent accidents. * When installing the tile, make sure to leave a small gap between the tiles. This gap will allow the grout to expand and contract. * When grouting the tile, make sure to use a grout that is waterproof. This will help prevent the grout from cracking and failing. * When sealing the shower pan, make sure to use a silicone sealant that is mold and mildew resistant. This will help prevent the sealant from deteriorating. ### Conclusion Making your own shower pan for tile is a great way to save money and add a personal touch to your bathroom. By following these steps, you can create a shower pan that is both waterproof and beautiful.
How To Build Shower Pans Diy Family Handyman

How To Make A Shower Pan With Pictures Wikihow
How To Build A Tile Shower Floor Pan Construction Diy

How To Build A Shower Pan

3 Shower Pan Choices For A Solid Tile Floor Installation Fine Homebuilding

How To Build A Shower Pan 2 Methods Diytileguy
How To Build A Tile Shower Floor Pan Construction Diy

How To Diy A Shower Pan Preslope The Space Between

How To Build A Shower Pan

How To Make A Shower Pan With Pictures Wikihow
Related Posts


