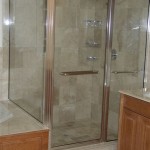
How to Make Your Own Shower Pan for a Tile Floor: A Step-by-Step Guide
### Introduction: A shower pan is an essential component of a properly installed tiled shower. It serves the crucial purpose of collecting and directing water towards the drain, preventing leaks and water damage to the subfloor and surrounding areas. If you're planning to install a tiled shower in your bathroom, you'll need to create a shower pan that ensures proper drainage and a long-lasting installation. While it may seem daunting at first, with careful preparation and the right materials, building a shower pan for a tile floor is a doable DIY project. ### Step 1: Gather the Necessary Materials and Tools: Before embarking on this project, ensure you have all the required materials and tools at hand. This list may vary depending on the specific design and materials you choose, but here are some general items you'll likely need: - Waterproof shower pan liner or membrane - Mortar mix - Sand mix - Cement board or backer board - Fiber tape or mesh tape - Thin-set mortar - Grout - Drain assembly - Shower drain grate - Measuring tape - Utility knife - Trowel - Hammer - Nails or screws - Safety goggles - Gloves ### Step 2: Prepare the Subfloor: Start by ensuring the subfloor where you'll be installing the shower pan is level and clean. If necessary, level the subfloor using a self-leveling compound. ### Step 3: Install the Shower Pan Liner: 1.Measure and Cut the Liner:
Measure the area where you'll be installing the shower pan, allowing for a few inches of overlap on the walls. Cut the liner to size using a utility knife. 2.Place the Liner:
Lay the shower pan liner on the prepared subfloor, ensuring it covers the entire area and extends up the walls by at least 6 inches. 3.Secure the Liner:
Use nails or screws to secure the liner to the subfloor along the perimeter. Space the fasteners every 6 to 8 inches. ### Step 4: Build the Shower Curb (Optional): If you desire a raised shower curb, follow these steps: 1.Create a Curb Frame:
Construct a frame using cement board or wood to create the desired curb shape and height. 2.Attach the Frame:
Secure the frame to the subfloor using nails or screws. 3.Install the Liner:
Extend the shower pan liner up and over the curb frame, ensuring it overlaps the top of the frame by at least 2 inches. Secure the liner to the frame using nails or screws. ### Step 5: Install the Cement Board or Backer Board: 1.Cut the Boards:
Measure and cut the cement board or backer board to fit the shower floor and walls, leaving a small gap around the drain assembly. 2.Apply Mortar:
Spread a thin layer of mortar mix onto the subfloor where the cement board or backer board will be installed. 3.Install the Boards:
Position the cement board or backer board onto the mortar bed, ensuring it's level and properly aligned. Press down firmly to ensure good adhesion. ### Step 6: Reinforce the Joints: 1.Apply Mortar:
Spread a thin layer of mortar mix over the joints between the cement board or backer board sheets. 2.Install Fiber Tape or Mesh Tape:
Press fiber tape or mesh tape into the mortar, ensuring it fully covers the joints. 3.Apply a Second Layer of Mortar:
Spread a second layer of mortar mix over the tape, creating a smooth and even surface. ### Step 7: Install the Drain Assembly: 1.Install Drain Pipe:
Connect the drain assembly to the drain pipe, ensuring a tight seal to prevent leaks. 2.Position the Drain Assembly:
Place the drain assembly into the designated location in the shower pan liner. 3.Secure the Assembly:
Secure the drain assembly to the subfloor using screws or bolts, following the manufacturer's instructions. ### Step 8: Install the Shower Tiles: 1.Choose Tiles:
Select suitable tiles for your shower floor and walls. Consider factors like slip-resistance and durability. 2.Prepare the Tiles:
If necessary, cut the tiles to the desired size and shape using a tile cutter. 3.Apply Thin-set Mortar:
Spread a thin layer of thin-set mortar onto the prepared cement board or backer board surface. 4.Install the Tiles:
Press the tiles into the thin-set mortar, ensuring they're level and properly aligned. Use spacers to maintain consistent gaps between the tiles. 5.Allow the Mortar to Dry:
Allow the thin-set mortar to dry completely according to the manufacturer's instructions. ### Step 9: Grout the Tiles: 1.Mix the Grout:
Prepare the grout mix according to the manufacturer's instructions. 2.Apply the Grout:
Use a grout float or grout bag to apply the grout to the joints between the tiles. 3.Clean the Grout:
Once the grout has slightly hardened, use a damp sponge to clean excess grout from the tile surfaces. ### Step 10: Install the Shower Drain Grate: 1.Choose a Drain Grate:
Select a drain grate that matches your shower design and style. 2.Position the Grate:
Place the drain grate over the drain assembly, ensuring it fits snugly and securely. ### Step 11: Allow the Shower Pan to Dry Completely: Allow the shower pan to dry completely for at least 24 hours before using the shower. This curing time is crucial for the proper bonding of the materials and ensuring a waterproof installation. ### Conclusion: By following these steps and using the appropriate materials and techniques, you can successfully create your own shower pan for a tile floor. This DIY project requires careful preparation and attention to detail to ensure a long-lasting and waterproof installation. With a little patience and effort, you can enjoy a beautifully tiled shower that adds value and elegance to your bathroom.
How To Make A Shower Pan With Pictures Wikihow
How To Build A Tile Shower Floor Pan Construction Diy

How To Build Shower Pans Diy Family Handyman

3 Shower Pan Choices For A Solid Tile Floor Installation Fine Homebuilding
How To Build A Tile Shower Floor Pan Construction Diy

How To Build A Shower Pan 2 Methods Diytileguy

How To Make A Shower Pan With Pictures Wikihow

Site Built Shower Pans Fine Homebuilding

How To Build A Tile Shower Pan Icreatables Com
How To Build A Tile Shower Floor Pan Liner And Drain Diy
Related Posts

