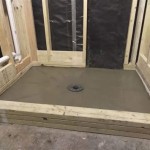
How to Make a Custom Shower Pan
A custom shower pan is a great way to add a personal touch to your bathroom. It can also be a good way to save money, as you can often find materials for a custom shower pan at a lower cost than a pre-made one. If you're up for the challenge, here's how to make your own custom shower pan:
Materials:
- Waterproof membrane
- Mortar mix
- Shower drain
- Pre-sloped shower pan liner
- Tiles
- Grout
Tools:
- Tape measure
- Level
- Hammer
- Notched trowel
- Grout float
- Caulk gun
Instructions:
- Measure the space for your shower pan. This will help you determine how much material you need.
- Prepare the subfloor. The subfloor should be level and smooth. If it's not, you'll need to level it before you can install the shower pan.
- Install the waterproof membrane. The waterproof membrane will help to protect the subfloor from water damage. Roll out the membrane and cut it to size. Then, tape the seams together.
- Install the mortar mix. The mortar mix will help to adhere the shower pan to the subfloor. Mix the mortar according to the manufacturer's instructions. Then, spread the mortar over the subfloor using a notched trowel.
- Install the shower drain. The shower drain will allow water to drain from the shower pan. Position the shower drain in the center of the shower pan. Then, connect the drain to the drainpipe.
- Install the pre-sloped shower pan liner. The pre-sloped shower pan liner will help to direct water towards the drain. Position the liner in the shower pan. Then, use a hammer to nail the liner in place.
- Install the tiles. The tiles will give your shower pan a finished look. Choose tiles that are rated for use in a shower. Then, use a notched trowel to spread thinset mortar over the pre-sloped shower pan liner. Press the tiles into the mortar. Be sure to leave a small gap between each tile.
- Grout the tiles. Grout will help to fill the gaps between the tiles. Mix the grout according to the manufacturer's instructions. Then, use a grout float to spread the grout over the tiles. Be sure to press the grout into the gaps between the tiles.
- Caulk the seams. Caulking the seams will help to prevent water from leaking out of the shower pan. Use a caulk gun to apply caulk to the seams between the tiles and the walls. Be sure to smooth out the caulk with your finger.
- Let the shower pan dry. Allow the shower pan to dry completely before using it. This may take up to 24 hours.
Tips:
- If you're not sure how to make a custom shower pan, you can hire a professional to do it for you.
- Be sure to wear gloves and safety goggles when working with mortar and grout.
- Make sure that the shower pan is properly sloped so that water can drain properly.
- Clean the shower pan regularly to prevent the growth of mold and mildew.

How To Make A Shower Pan With Pictures Wikihow

How To Build Shower Pans Diy Family Handyman

How To Build A Shower Pan 2 Methods Diytileguy

How To Make A Shower Pan With Pictures Wikihow
How To Build A Tile Shower Floor Pan Construction Diy

Site Built Shower Pans Fine Homebuilding

Custom Shower Base How To Make A Pan In 8 Steps

3 Shower Pan Choices For A Solid Tile Floor Installation Fine Homebuilding

How To Make A Shower Pan With Installation Building Liner

How To Build A Shower Pan 2 Methods Diytileguy
Related Posts


