How to Install Prefabricated Shower Walls: A Comprehensive Guide for Seamless Installation
Upgrading your bathroom with prefabricated shower walls offers a convenient and time-saving solution for a brand-new shower without extensive construction. This guide will provide you with a comprehensive overview of the essential steps involved in installing prefab shower walls, ensuring a seamless and professional finish.
Step 1: Plan and Prepare
Before commencing the installation, it's crucial to plan and prepare thoroughly. Start by measuring your existing shower space accurately and purchasing the appropriate prefab shower walls accordingly. Gather all the necessary tools, including a level, measuring tape, saw, drill, and adhesive.
Step 2: Inspect and Prepare Walls
Remove any existing shower wall panels or fixtures. Ensure that the underlying wall surfaces are flat, plumb, and free of debris or mold. If necessary, use leveling compound to smooth out any imperfections. Install backer boards over the prepared wall surfaces to provide a stable base for the prefab walls.
Step 3: Assemble the Walls
Carefully uncrate the prefab shower walls and lay them out in the designated order. Assemble the walls by connecting them using the provided clips or hardware. Ensure that the corners of the assembled walls are perfectly aligned and square. Use level and plumb to align the walls vertically and horizontally.
Step 4: Secure the Walls
Once the walls are assembled, it's time to secure them permanently. Start by applying a generous bead of adhesive to the back of each wall panel. Then, carefully lift and position each wall into place, pressing firmly to ensure good adhesion. Use a level to double-check alignment and adjust as needed.
Step 5: Seal and Waterproof
To prevent moisture penetration, it's essential to seal all joints and corners of the prefab shower walls. Apply a waterproof sealant along all seams, paying particular attention to the corners. Allow the sealant to cure for the recommended time before proceeding to the next step.
Step 6: Install Fixtures
With the prefab shower walls securely installed and waterproofed, it's time to install the fixtures, including showerheads, faucets, and shelves. Follow the manufacturer's instructions for each fixture to ensure proper installation and functionality.
Step 7: Grout and Clean
For a polished finish, apply grout along the joints between the prefab shower walls. Use a grout float to evenly distribute the grout and create a smooth surface. Once the grout has set, remove any excess with a damp sponge. Finally, clean the entire shower area to remove any residue or dust.
By following these steps meticulously, you can achieve a professional-looking prefab shower wall installation that will enhance the functionality and style of your bathroom for years to come.

How To Install A Shower Surround The Home Depot

How To Install A Direct Stud Shower Enclosure The Home Depot

How To Install A Direct Stud Shower Enclosure The Home Depot With Thisoldhouse

Installation Of Laminate Bathroom Wall Panels For Multi Unit Properties Innovate Building

Install A New Shower With Base Wall Panels And Pivot Door Rona

Install A New Shower With Base Wall Panels And Pivot Door Rona

Diy Tile Shower Tub Insert To Stone Wall

Install A New Shower With Base Wall Panels And Pivot Door Rona

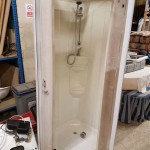
Prefabricated Shower Enclosure American Bath Enterprises

Prefab Shower Niches Fine Homebuilding
Related Posts