How To Install Cement Board In A Shower Stall
Installing cement board in a shower stall is a crucial step in creating a waterproof and durable shower system. Cement board offers several advantages over traditional drywall, including its resistance to moisture, mold, and mildew, making it an ideal material for shower installations. Here's a step-by-step guide to help you install cement board in your shower stall:
Step 1: Gather Necessary Materials and Tools
Before starting the installation process, ensure you have gathered all the necessary materials and tools. You will need:
- Cement board sheets (thickness typically ranges from 1/2 inch to 1 inch)
- Cement board screws (1-1/4 inches long)
- Drill with a 1/8-inch drill bit
- Level
- Tape measure
- Utility knife
- Safety glasses
- Dust mask
Step 2: Prepare the Shower Stall
Before installing the cement board, it is essential to prepare the shower stall. This includes:
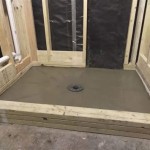
- Removing any existing drywall or tiles from the shower walls.
- Ensuring the shower stall is plumb and level.
- Applying a waterproof membrane to the shower floor and walls, extending it at least 6 inches above the showerhead.
Step 3: Measure and Cut Cement Board Sheets
Measure the walls of the shower stall to determine the size of the cement board sheets you need. Use a utility knife to score and snap the cement board sheets to the desired size.
Step 4: Install Cement Board Sheets
Start installing the cement board sheets from the bottom of the shower stall. Position the first sheet in place and use a level to ensure it is straight. Secure the sheet to the studs using cement board screws, driving them at least 1 inch deep into the studs. Continue installing the remaining cement board sheets, ensuring they are tightly fitted and level.
Step 5: Apply Cement Board Seams
After installing the cement board sheets, it is essential to apply cement board seams to the joints between the sheets. Use a cement board joint compound and a putty knife to apply the seams, ensuring they are smooth and continuous. Allow the seams to dry completely according to the manufacturer's instructions.
Step 6: Install Backer Boards for Tile
Once the cement board seams are dry, you can install backer boards for the tile. These backer boards are typically made of a waterproof material and provide a stable surface for the tile installation.
Step 7: Apply Waterproofing Membrane
To ensure complete waterproofing, apply a final layer of waterproofing membrane over the cement board and backer boards. This membrane should extend at least 6 inches above the showerhead and overlap the shower floor membrane.
By following these steps, you can successfully install cement board in your shower stall, providing a durable and waterproof base for your shower tiles.

Here S How Install A New Shower Stall With Tile Floor
How To Install Shower Backerboard Hardieboard Cement Proper Installation Diy

How To Install Shower Surround Tile Backer Board Part 2 Durock Or Cement

How To Install Durock Cement Board Making Maanita

Tile Backer Board Installation 60 Bathtub Surround Walls For Part 2

Proper Way To Set Wallboard For Shower

Cement Board Is The First Step In Any Good Tiling Project Getting Perfect Holes For Shower Handle An Bathroom Stalls Bath Remodel Bathrooms
How To Install Shower Backerboard Hardieboard Cement Proper Installation Diy

Guest Bathroom Renovation Insulation And Cement Board Installation
Installing Cement Board On Shower Wall Advice Diy Home Improvement Forum
Related Posts

