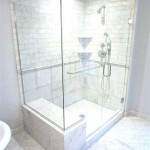
How to Build Your Own Shower Floor: A Step-by-Step Guide for DIYers
Building your own shower floor is a challenging but rewarding project that can save you money and give you the satisfaction of creating a custom shower that perfectly matches your needs and style. If you're up for the challenge, here's a step-by-step guide to help you get started: ### 1. Plan Your Shower Floor Start by determining the size and shape of your shower floor. Consider the layout of your bathroom and the space available. You'll also need to decide on the type of shower floor you want, such as a tiled floor, a solid surface floor, or a prefabricated shower pan. ### 2. Prepare the Subfloor Once you know the size and shape of your shower floor, you need to prepare the subfloor. This typically involves removing the old flooring, leveling the subfloor, and installing a waterproof membrane. ### 3. Install the Shower Drain The next step is to install the shower drain. Choose a drain that is compatible with the type of shower floor you have chosen. Follow the manufacturer's instructions for installing the drain. ### 4. Build the Shower Floor Curb If you are installing a tiled shower floor, you will need to build a shower floor curb to prevent water from leaking out of the shower. The curb can be made from concrete blocks, bricks, or a prefabricated shower curb kit. ### 5. Install the Shower Floor Now it's time to install the shower floor. If you are using tiles, start by laying out the tiles dry to make sure they fit properly. Once you are satisfied with the layout, apply thin-set mortar to the subfloor and press the tiles into place. If you are using a solid surface material, such as acrylic or fiberglass, follow the manufacturer's instructions for installing the shower floor. ### 6. Waterproof the Shower Floor Once the shower floor is installed, you need to waterproof it. This can be done by applying a waterproof sealant to the joints between the tiles or by installing a waterproof membrane over the entire shower floor. ### 7. Install the Shower Fixtures The final step is to install the shower fixtures, such as the shower head, the shower valve, and the grab bars. Follow the manufacturer's instructions for installing the fixtures. ### 8. Enjoy Your New Shower! Once the shower is complete, you can step back and enjoy your new shower. You'll have the satisfaction of knowing that you built it yourself. ### Tips for Building Your Own Shower Floor * Make sure you have all the necessary tools and materials before you start working. * Follow the manufacturer's instructions carefully for each step of the process. * If you are not confident in your ability to complete the project, hire a qualified contractor to help you. * Be patient and take your time. Building a shower floor is a time-consuming process, but it's worth it in the end.
How To Build Shower Pans Diy Family Handyman

How To Make A Shower Pan With Pictures Wikihow
How To Build A Tile Shower Floor Pan Construction Diy

How To Build A Shower Pan
How To Build A Tile Shower Floor Pan Construction Diy

How To Build A Shower Pan 2 Methods Diytileguy

How To Make A Shower Pan With Pictures Wikihow

How To Pour A Shower Pan

How To Build A Shower Pan

Build A Shower Tips And Tricks Part 1
Related Posts

