How to Build a Shower Stall from Scratch: A Comprehensive Guide
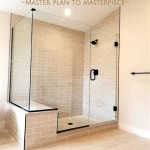
Building a shower stall from scratch may seem like a daunting task, but with careful planning and proper execution, it can be a rewarding project. Whether you're aiming for a lavish master bath or a functional upgrade to your existing bathroom, this guide will provide you with a step-by-step approach to ensure a successful renovation.
Step 1: Planning and Design Considerations
Begin by determining the size and placement of your shower stall, taking into account the limitations of your bathroom space and your preferred shower style. Consider factors such as ventilation, access to plumbing, and the aesthetic appeal of the design. Sketch out a detailed plan, including the dimensions and layout, to guide you during the construction process.
Step 2: Gather Materials and Tools
Assemble the necessary materials for the shower stall, including waterproof backer board, cement board, tile, grout, thinset mortar, plumbing fixtures, and drainage components. You will also need basic tools such as a level, measuring tape, tile saw, drill, and screwdrivers.
Step 3: Framing the Shower Stall
Start by building the frame of the shower stall using pressure-treated lumber or galvanized steel studs. Secure the studs vertically, ensuring they are plumb and level. Install horizontal headers and trimmers to provide stability and support for the shower pan.
Step 4: Installing the Shower Pan
Next, install the shower pan, a pre-sloped waterproofing membrane that provides a waterproof base for the shower. Carefully fit the pan into the shower stall and seal the joints using waterproof caulk or sealant.
Step 5: Wall Backer Board Installation
Apply waterproof backer board, such as cement board or green board, to the studs and shower pan. The backer board provides a stable surface for tile installation and protects against water damage.
Step 6: Tile Installation
Begin tiling from the bottom row and work your way up. Spread a layer of thinset mortar on the backer board and use a notched trowel to create ridges. Press the tiles into the mortar and ensure they are level and evenly spaced. Use tile spacers to maintain uniform grout lines.
Step 7: Grouting and Waterproofing
After the tiles are set, fill the joints with grout using a grout float. Allow the grout to cure and then seal it with a waterproof sealant to prevent moisture penetration.
Step 8: Plumbing and Fixture Installation
Install the plumbing fixtures, including the showerhead, faucet, and drain. Ensure that all connections are secure and watertight. Test the system for proper drainage and adjust as needed.
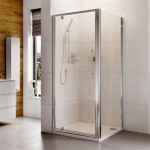
Step 9: Door or Curtain Installation
Finally, install a shower door or curtain to enclose the shower stall. Choose a door or curtain that complements the overall design and provides privacy.
Additional Tips:
- Use waterproof materials and sealants throughout the construction process to prevent water damage.
- Allow sufficient drying time for each step of the installation.
- Test the shower stall thoroughly for leaks before sealing it.
- Consider installing a ventilation fan to prevent moisture buildup.
- For complex or custom designs, it is advisable to consult with a qualified contractor.

How To Build A Walk In Shower From Scratch Step By Tutorial

How To Build A Shower Pan

Diy Walk In Shower Step 1 Rough Framing Kick Ass Or Die

How To Make A Shower Pan With Pictures Wikihow

8 Simple Steps To Build A Shower

How To Build A Tile Shower Pan Icreatables Com

Shower Cabin Installation A Step By Guide To Effortless Setup

How To Build A Tile Shower Pan Icreatables Com

Diy Shower Pan Step By Guide

How To Build A Custom Shower Niche Step By
Related Posts