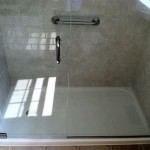
Having a frameless shower door adds a luxurious touch to any bathroom. But like all fixtures, they require regular maintenance and adjustment. Adjusting frameless shower door hinges is an easy DIY project that can be done in just a few minutes. This article will provide you with step-by-step instructions on how to adjust your frameless shower door hinges.
Tools Needed
Before you begin adjusting your frameless shower door hinges, make sure you have the following tools on hand:
- Phillips head screwdriver
- Adjustable wrench
- Level
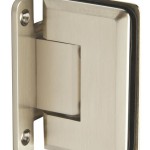
Step 1: Loosen the Top and Bottom Hinges
The first step in adjusting your frameless shower door hinges is to loosen the top and bottom hinges. To do this, use the Phillips head screwdriver to loosen the screws on the hinges. Do not remove the screws completely, just loosen them enough so they are no longer tight.
Step 2: Adjust the Height of the Door
Once the screws are loosened, you can adjust the height of the door. Use the adjustable wrench to loosen the hinge pins on the top and bottom of the door. Adjust the height of the door until it is level, using a level to check. Once the door is level, tighten the hinge pins again.
Step 3: Tighten the Top and Bottom Hinges
The final step in adjusting your frameless shower door hinges is to tighten the top and bottom hinges. Use the Phillips head screwdriver to tighten the screws on the hinges. Make sure the screws are tight enough that the door is secure, but not so tight that it is difficult to open and close.
Conclusion
Adjusting frameless shower door hinges is an easy DIY project that can be done in just a few minutes. All you need is the right tools and a few simple steps. Once you have adjusted your frameless shower door hinges, your door will be perfectly level and secure.


Related Posts