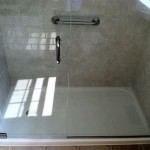
Do-it-yourself shower wall panels are a great way to add style and functionality to your bathroom. With a few simple steps, you can create a custom shower wall system that will add character and value to your home. This article will provide you with all the information you need to build your own shower wall system from scratch.
What You’ll Need
Before you begin, you’ll need to gather the supplies you’ll need to build your shower wall panels. You’ll need:
- Shower wall panels
- Shower wall panel clips
- Shower wall panel adhesive
- Utility knife
- Tape measure
- Level
- Drill
- Screwdriver
Measuring & Cutting the Shower Wall Panels
The first step in building your shower wall panel system is to measure and cut the panels to fit your space. Measure the area where you plan to install the panels and use a tape measure and a level to mark the area for cutting. Once you have the measurements, use a utility knife to cut the panels to size.
Installing the Shower Wall Panel Clips
Once the panels are cut to size, you can begin to install the wall panel clips. Use a drill to pre-drill holes in the wall for the clips. Then, use a screwdriver to secure the clips to the wall. Make sure the clips are firmly in place and that the panels fit snugly into the clips.
Applying the Adhesive
The next step is to apply the adhesive to the back of the panels and the wall. This will help ensure that the panels are secured in place. Once the adhesive is applied, carefully press the panels into the clips and use a level to make sure the panels are even and level.
Conclusion
Building your own shower wall panel system is an easy, cost-effective way to upgrade your bathroom. By following the steps outlined in this article, you can create a custom shower wall system that will last for years to come. Good luck and happy DIYing!


Related Posts