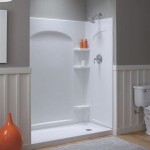
Adding a shower niche can add a luxurious touch to any bathroom. Not only does it provide a great area to store shampoos and conditioners, but it can also be a great way to add visual interest to your bathroom. Tiling the niche is an easy and low-cost way to give your bathroom a makeover. Here is a step-by-step guide on how to tile a shower niche from start to finish.
Step 1: Prepare the Niche for Tiling
Before you begin tiling, you need to prep the niche for the tile. Start by checking for any cracks or holes in the surface. If you find any, use a patching compound to fill them in. Once the surface is patched, use a primer to ensure that the tile has a good adhesive bond. Finally, use a level to make sure the surface is even.
Step 2: Measure and Cut the Tiles
Once the niche is ready, you can start measuring and cutting the tiles. Measure the area you wish to tile and then cut the tiles to size. You can use either a wet saw or a tile nipper to cut the tiles. Make sure that all the pieces fit together before you begin laying them down.
Step 3: Apply the Adhesive and Lay the Tiles
Once the tiles are cut to size, you can begin laying them down. Start by applying the adhesive to the surface, using a notched trowel. Then, lay the tiles down in the desired pattern. Make sure to press the tiles firmly into the adhesive to ensure a good bond.
Step 4: Grout the Tiles
Once the tiles are laid, you can begin grouting. Start by mixing the grout according to the manufacturer’s instructions. Then, use a grout float to spread the grout over the tiles. Make sure to press it firmly into the spaces between the tiles. Finally, use a damp sponge to wipe away any excess grout.
Step 5: Seal the Grout
Once the grout is dry, you need to seal it. Sealing the grout will protect it from dirt and moisture. Simply apply a grout sealer, following the manufacturer’s instructions. Allow the sealer to dry before using the shower niche.
Step 6: Enjoy Your New Shower Niche
Now that your shower niche is finished, it’s time to enjoy the results. A tiled shower niche is a great way to add a touch of luxury to your bathroom. Plus, it will help keep your bathroom looking neat and organized. So sit back, relax, and enjoy your new shower niche!


Related Posts


