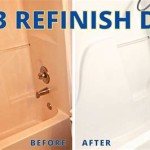
A shower stall floor can be damaged over time due to regular use and wear and tear. Repairing your shower stall floor is a relatively straightforward task, and can be done in a few steps. Read on to learn how to repair your shower stall floor.
Step 1: Assess the Damage
The first step in any repair job is to assess the damage and determine the extent of the repair needed. You’ll need to inspect the floor and identify any cracks, chips, or other damage. Make sure to take any necessary measurements so you know how much material you’ll need for the repair.
Step 2: Clean the Area
Once you’ve assessed the damage, you’ll need to clean the area. Start by using a wet/dry vacuum to remove any dirt and debris from the surface. Then, use a mild detergent and warm water to scrub the area and remove any soap scum or mildew. Make sure to rinse the area thoroughly and dry it with a towel.
Step 3: Prepare the Materials
Once the area is clean and dry, you’ll need to gather the materials for the repair. For most shower stall floor repairs, you’ll need epoxy or silicone caulk, a putty knife, a razor blade, and a grout saw. Make sure to read the instructions on the packaging before you begin the repair to ensure you’re using the right material for the job.
Step 4: Make the Repair
Once you’ve gathered the necessary materials, you can begin the repair. Start by using the putty knife to spread the epoxy or caulk into the cracks and smooth it out. Then, use the razor blade to cut away any excess material. Finally, use the grout saw to cut away any loose or damaged grout and replace it with new grout.
Step 5: Let the Repair Dry
Once you’ve finished the repair, it’s important to let it dry completely before using the shower stall floor. Depending on the type of material you used, this could take anywhere from a few hours to a couple of days. Make sure to follow the instructions on the packaging to make sure the repair is done properly.
Step 6: Test the Repair
Once the repair has dried completely, you’ll want to test it out to make sure it’s secure. Gently press down on the repaired area to make sure it’s secure and doesn’t move. If it’s secure, then the repair is complete and you can use the shower stall floor again.
Conclusion
Repairing your shower stall floor is a relatively simple task that can be done in a few steps. Start by assessing the damage, then clean the area and prepare the materials. Once you’ve gathered the necessary materials, make the repair, let it dry, and then test it out before using the shower stall floor again. With these steps, you’ll be able to repair your shower stall floor in no time.


Related Posts

