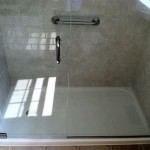
Maintaining your shower grout is essential to keep it looking great and prevent water damage. Whether you’re dealing with a cracked, discolored, or crumbling sealant, it’s important to know how to fix it properly. This comprehensive guide will provide you with all the information you need to repair your shower grout and keep it looking good for years to come.
Understanding the Problem
Shower grout is used to seal the joints in between your shower tiles. Over time, it can begin to crack, discolor, or crumble away, leaving your shower vulnerable to water damage. To prevent further damage, it’s important to identify the problem and take the appropriate steps to repair it.
Common Causes of Shower Grout Damage
There are a few common causes of shower grout damage that you should be aware of. These include:
- Inadequate cleaning: Not cleaning your shower grout regularly can lead to a buildup of dirt, soap scum, mildew, and mold, which can cause it to crack or discolor.
- Excessive moisture: Excessive moisture in your shower can cause the grout to expand, contract, and crack.
- Improper installation: If your shower grout was not installed correctly, it can lead to cracking or crumbling.
- Age: Over time, your shower grout may begin to degrade and need to be replaced.
Tools and Materials Needed for Shower Grout Repair
Before you get started, make sure you have all the necessary tools and materials to complete the job. You will need:
- Sponge or cloth
- Grout sealer
- Grout saw
- Grout removal tool
- Grout
- Grout float
- Grout cleaner
Step-by-Step Guide to Repairing Shower Grout
To repair your shower grout, you should follow these steps:
- Clean the affected area: Use a sponge or cloth to remove any dirt, soap scum, mildew, or mold from the grout.
- Remove the old grout: Use a grout saw or removal tool to remove the old grout.
- Clean the area again: Once the old grout has been removed, use a grout cleaner to remove any remaining residue.
- Apply the new grout: Use a grout float to apply the new grout to the affected area.
- Allow the grout to dry: Allow the newly applied grout to dry for 24 hours before sealing it.
- Seal the grout: Apply a grout sealer to the new grout to protect it from water damage.
Conclusion
Repairing your shower grout is essential to prevent further water damage. With the right tools and materials, you can repair your shower grout quickly and easily. Be sure to follow the steps outlined above and your shower grout will be looking good as new in no time.


Related Posts


