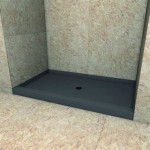
Installing tile in your shower can be a great way to update the look of your bathroom and give it a fresh and modern feel. However, it can be a difficult and time-consuming process. This guide will walk you through the process of installing tile in your shower step-by-step, so you can get the job done right the first time.
Step 1: Gather Your Materials
The first step to installing tile in your shower is to gather all the materials you will need. This includes tile, grout, a trowel, a wet saw, spacers, a sponge, a grout float, a drill, a level, and adhesive. Make sure you have all the necessary materials before you start the project.
Step 2: Prep the Area
Before you start laying the tile, you need to prep the area. This means removing any existing tile, cleaning the walls, and ensuring the surface is flat and level. This can take some time and effort, but it is essential for getting the best results.
Step 3: Measure and Mark
Once the area is prepped, you need to measure and mark the area where you will be laying the tile. This will help you ensure that the tile is installed in a straight line and that the tile is evenly spaced. You can use a level and a ruler to help you measure and mark the area.
Step 4: Apply the Adhesive
Once the area is measured and marked, you can begin to apply the adhesive. Use a trowel to spread the adhesive evenly over the area. Make sure to get into all the corners and edges to ensure a secure bond.
Step 5: Lay the Tile
Now that the adhesive is in place, you can begin to lay the tile. Start by laying the first tile in the corner, and then work your way outward, placing spacers between each tile to ensure that they are evenly spaced. Use a level to make sure that the tiles are straight, and then use a wet saw to cut any tiles that need to be cut to fit the area.
Step 6: Grout the Tile
Once the tile is laid, it’s time to grout. Mix the grout according to the instructions on the package, and then use a grout float to spread the grout over the tile. Make sure to press it into the gaps between the tiles. Once the grout is dry, use a damp sponge to wipe away any excess grout.
Step 7: Seal the Grout
The final step is to seal the grout. This will help to prevent water from seeping into the grout and causing damage. Use a brush or roller to apply the sealant, and make sure to cover the entire surface. Allow the sealant to dry before using the shower.
Conclusion
Installing tile in your shower can be a time-consuming but rewarding project. Following the steps outlined in this guide will help you get the best results and ensure that your tile is installed properly. With some patience and attention to detail, you can transform your shower into a beautiful and modern space.


/Workman-Tiling-a-Shower-499630724-56a4a1a33df78cf7728353cc.jpg)


Related Posts


