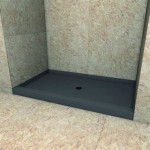
Installing a tiled shower floor can be a tedious and time-consuming task, but it’s also one of the most rewarding and beautiful ways to update your bathroom. With the right preparation and materials, you can have a tiled shower floor that will last for years to come. Here are the steps to take to properly install a tile shower floor.
Step 1: Gather Your Supplies
Before you can begin installing your tile shower floor, the first step is to make sure that you have the right supplies. You’ll need the following items:
- Tile
- Tile adhesive
- Tile grout
- Grout sealer
- Mortar
- Trowel
- Sponge
- Bucket
- Grout float
- Tile spacers
Step 2: Prepare the Shower Floor
The next step is to prepare the shower floor for tiling. This includes making sure that the floor is free of any debris or dirt and that it is level. You may need to use a trowel to level out any dips or bumps in the floor. Once the shower floor is clean and level, you can begin to lay the tile.
Step 3: Apply the Tile Adhesive
Once the shower floor is prepared, you can begin to apply the tile adhesive. Start in the corner of the shower and use a trowel to spread the adhesive across the shower floor. Make sure to use even pressure and make sure that the adhesive is spread out evenly. Once the adhesive is applied, you can begin to lay the tile.
Step 4: Lay the Tile
Begin laying the tile in the corner of the shower and work your way outwards. Use tile spacers to ensure that the tiles are evenly spaced. Make sure to press down firmly on each tile to ensure that it is securely attached to the shower floor. Once all of the tiles are laid, you can move onto the next step.
Step 5: Apply the Grout
Once the tile is laid, it’s time to apply the grout. Begin by mixing the grout and water in a bucket according to the instructions on the package. Use a grout float to spread the grout in between the tiles, making sure to press down firmly. Once all of the grout is applied, use a damp sponge to wipe away any excess grout. Allow the grout to dry before applying the grout sealer.
Step 6: Apply the Grout Sealer
Once the grout is dry, you can apply the grout sealer. This will help protect the grout from moisture and will make it easier to clean. Simply apply the sealer according to the instructions on the package. Allow the sealer to dry completely before using the shower.
Step 7: Caulk the Edges
The final step is to caulk the edges of the tile to ensure that there are no gaps or cracks. Use a caulking gun to apply the caulk around the edges of the tile. Make sure to smooth out the caulk so that it is even and free of air bubbles. Allow the caulk to dry before using the shower.
By following these steps, you can easily install a tile shower floor in your bathroom. With the right preparation and materials, you can have a beautiful and long-lasting tiled shower floor. Good luck!


Related Posts


