Basements are notorious for having limited space, which can make it difficult to install a shower. However, installing a shower in a basement is not impossible. With the right materials and know-how, you can install a shower in your basement in no time.
Step One: Plan Your Space
Before you start to install your shower, you need to make sure that you have enough space. Measure the area where you want to install the shower, and plan out the layout to make sure you have enough room. You will also need to make sure that the area is properly ventilated, to avoid any moisture buildup.
Step Two: Prepare the Area
Once you have planned out your space, you need to start preparing the area. This means removing any existing fixtures and cleaning the area. You will also need to remove any insulation that is in the way. This can be done by using a utility knife to cut away the insulation.
Step Three: Install the Drain
Once the area is prepared, you can start to install the drain. You will need to attach the drain to the shower pan, and then connect it to the sewer pipe. Make sure that all of the connections are properly sealed, to avoid any leaks.
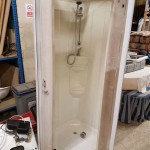
Step Four: Install the Shower Pan
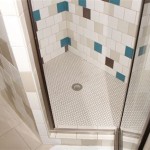
Once the drain is installed, you can begin to install the shower pan. The pan should be placed on a flat, level surface. Make sure that the pan is properly secured, and that it is level. You will also need to seal the seams of the pan, to avoid any water leaks.
Step Five: Install the Shower Walls
Once the shower pan is installed, you can begin to install the shower walls. You will need to measure the walls, and then cut them to fit the space. Make sure that the walls are properly sealed, to avoid any water leaks. You will also need to attach the walls to the shower pan, using screws.
Step Six: Install the Fixtures
Once the walls are installed, you can begin to install the fixtures. This includes the shower head, the faucet, and any other fixtures that you want to include. Make sure that all of the fixtures are properly sealed, and that they are connected to the appropriate water supply lines.
Step Seven: Test the System
Once everything is installed, you can test the system to make sure that it is working properly. Turn on the water supply and make sure that the water is flowing properly. You should also check for any leaks or other problems. Once you are sure that the system is working properly, you can enjoy your new shower.


Related Posts